- Draw blood, using VACU 10 into PPT I tube containing gel & ACD (vacuum allows max. 10 ml blood per tube). Immediately, mix tube gently with ACD.
- Centrifuge 10 min, 1450-2050 G, Room Temperature. ACR tube plasma yield = 6-7 ml.
- Remove cap from tube.
- Removal of PPP phase. Place the tube in the rack. Attach the 10 cm blunt needle to 10 ml syringe. Remove cap of tube and insert 10 cm needle until you reach to the surface of plasma. Then carefully draw plasma from the surface and downward for about 50% to 60%, 3 to 3.5 ml. You are now removing PPP phase. Do not insert needle too deep from the surface of plasma. After drawing PPP into the syringe, discard this PPP.
- PRP harvesting: Using the same 10 ml syringe with 10 cm blunt needle, you will reach to the remaining plasma. You are now dealing with PRP. Draw remaining PRP into syringe without touching the separation gel. Then gently pump back PRP in the syringe against gel surface and around the tube wall to lift platelet on the gel surface. Carefully repeat this process 2 to 3 times. This is a very important process to harvest platelets as much as possible.
- Cap the tube. Re-mix again PRP in remaining 2-2.5 ml of plasma, by gently vortexing it (vortex speed – number 3) for 30 seconds
- Place the tube in the rack, and remove cap from the tube. Take the filter sleeve, peel sterile cover to a half way from filter side to expose bottom side of sleeve. Hold cap with sterile cover on and insert filter into the tube until filter gently touches gel surface. PRP now enters inside of sleeve chamber.
- Attach the 10 cm blunt needle, to the 1 ml syringe.
- Insert 10 cm blunt needle into sleeve chamber through Monocap hole.
- Draw 1 ml from the plasma in the Sleeve.
- Remove blunt needle from syringe and leave it in the Monocap hole. Attach the 30G needle to the syringe.
- Inject PRP to patient in less than 5 minutes time.
- Repeat steps 8-12 until all PRP volume is consumed.
Intra-dermal clot formation after 10 to 20 minutes.
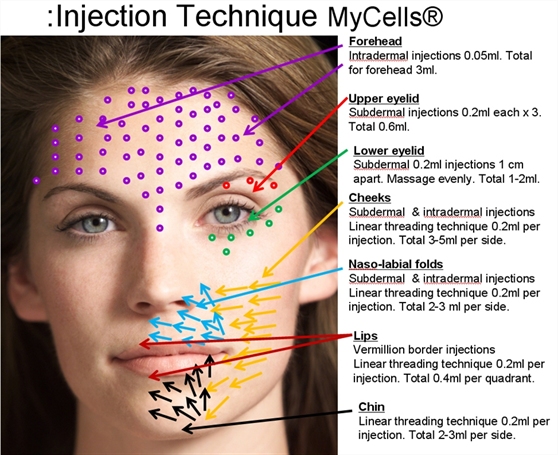
PRP Injections:
MyCells® harvesting kit – regulatory certificates:
• FDA Permission to market, Sep. 2009.
• CE Class II A for in vivo usage (re-injectables) – approved, Feb 2008.
• ISO 13485 – Approved, Nov 2007.
How does MyCells® really work?
- PLT clotting occurs within 10 min after PLT de-granulation, thus anti coagulant in included within the MyCells® kit.
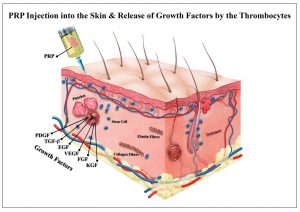
- The process of releasing growth factors (GF) from platelets is called de-granulation. During this process, the contents of the PLT -granules are being released by budding from PLT membranes and addition of side chains. Thus, PLT are requires to be viable and intact.
- GF bind to Receptors of the cells that are being attracted to the wound.
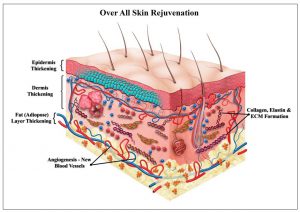
- Initiation of production of collagen and cell proliferation – Chemo attractant activity – attract Mesenchymal stem cells to the wound.
- = Acceleration of normal wound healing process.
Growth Factors and proteins released by PLT:
- PDGF:
• Cells replication
Stem cells differentiation
Angiogenesis – vascularisation
Chemo-attraction of Macrophages, fibroblasts
- TGF:
• Induction of connective tissue formation - ILGF:
• Wound healing - EGF:
• Induction of cell differentiation - Fibrin
- Fibronectin
- Vitronectin
MyCells® – Contra-Indications
- Platelet Dysfunction Syndrome
- Critical Thrombocytopenia
- Hypofibrinogenaemia
- Haemodynamic Instability
- Sepsis
- Acute & Chronic Infections
- Chronic Liver Pathology
- Anti-coagulation Therapy
MyCells® – Suggested Applications
- Subcision technique (acne scars)
- Layer specific transplant
- “Tenting” of skin
- “Cul-de-sac” & needle bevel up
- Over-correction 50%
- Avoid “under-dosing”
- Serial Rx’s = accumulative effect
- Minimal-trauma technique (long needle)
- Intra-dermal injection = blanching
Navigation
Categories
- No categories


